Tonight, though we were finishing up Risa's ornament. For the last several years, the kids have picked out a few ornament designs to make to give as gifts. Last year, I prepped about 8 or 10, I don't know... too many... designs for them to choose from. What a craft-tastic mess! This year, they each picked ONE ornament to make a dozen of (each). The ornaments are a bit more complicated though. Tonight, I present Risa's choice.
Handprint Snowman and Glitter Ornaments
Risa was not content to just buy a colored ornament and put snowman handprints on it. No no. The girl wanted glitter! So we used the glitter ornament how-to from I'm a Yarner found here: http://yarner.blogspot.com/2011/10/glitter-ornament-tutorial.html
Supplies Needed:
Clear glass ornaments
Future Floor Finish (it's what I had under the sink versus the Pledge called for in the original list)
Funnel (or envelope to use as a funnel)
Glitter - original called for extra fine. We used "regular" fine until we ran out then used bigger glitter. You need extra fine or fine. The bigger glitter, while pretty, didn't have the same WOW factor.
2 spare containers for extra floor finish and extra glitter
Pop out the metal tops on the ornament. Pour a shot of Future into the ornament and swirl to coat the inside. Don't shake. You want to keep bubbles to a minimum. Pour glitter into the ornament. Cover the top with a finger and THEN shake to coat. This takes more glitter than you realize. Pour the excess out into another bowl. Reuse that extra to make more ornaments. I wouldn't plan to use that for anything else since it'll likely have some of the floor finish on it. I then waited a day for the "glue" to dry before recapping the ornaments.
We found the handprint snowman idea from Full of Great Ideas here: http://fullofgreatideas.blogspot.com/2010/11/five-fingers-snowman-ornament.html
Supplies Needed:
Glitter ornaments
White craft paint
Permanent markers
Pour white paint on a plate. Have your child press their hand into the paint. Carefully place the ornament in their hand and have them wrap their hands up around the ornament. Have them open their hand again and carefully remove the ornament. Put it upside down in a cup or egg carton to dry. Once dry, use permanent markers to make the snowman. I used mostly larger tip markers. The medium tip Sharpies did not like to work on the paint finish and dried out easily.
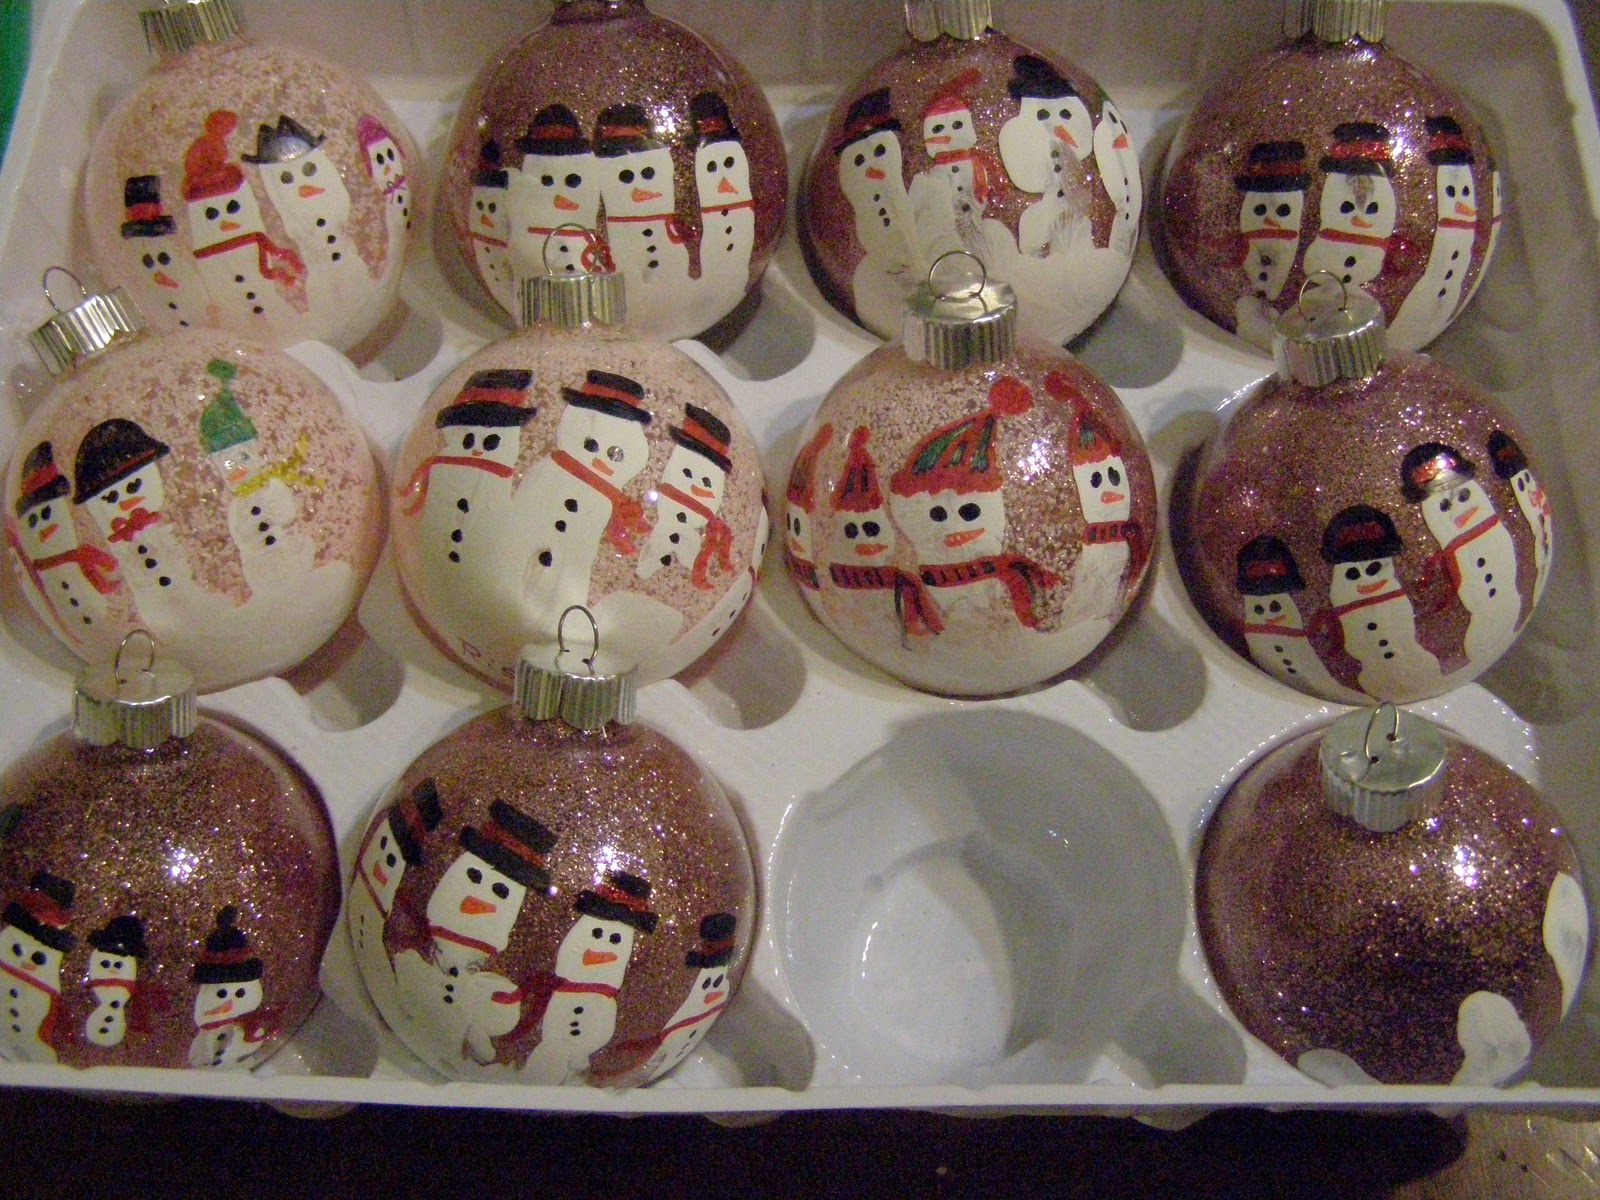
The pale pink are the ones made with the bigger glitter. Just not the bling factor that's present in the fine glitter. Though, with the snowman, the pale pink looks a bit like snowflakes. I wrote her name and the year on the bottom of each ornament. The missing one has already made its way to Ama and Apa's house in Alabama. And yes... I still have one to do. I just didn't have it in me tonight.
They are very cute.
ReplyDeleteTHANKS! My kids have pretty good taste. And I LOVE Pinterest for finding craft ideas now. We can browse images instead of text. MUCH easier and more fun with children.
ReplyDelete